
Remove the damaged floor layer
We strip everything unsound back to solid concrete and clear the joint between balcony and wall.
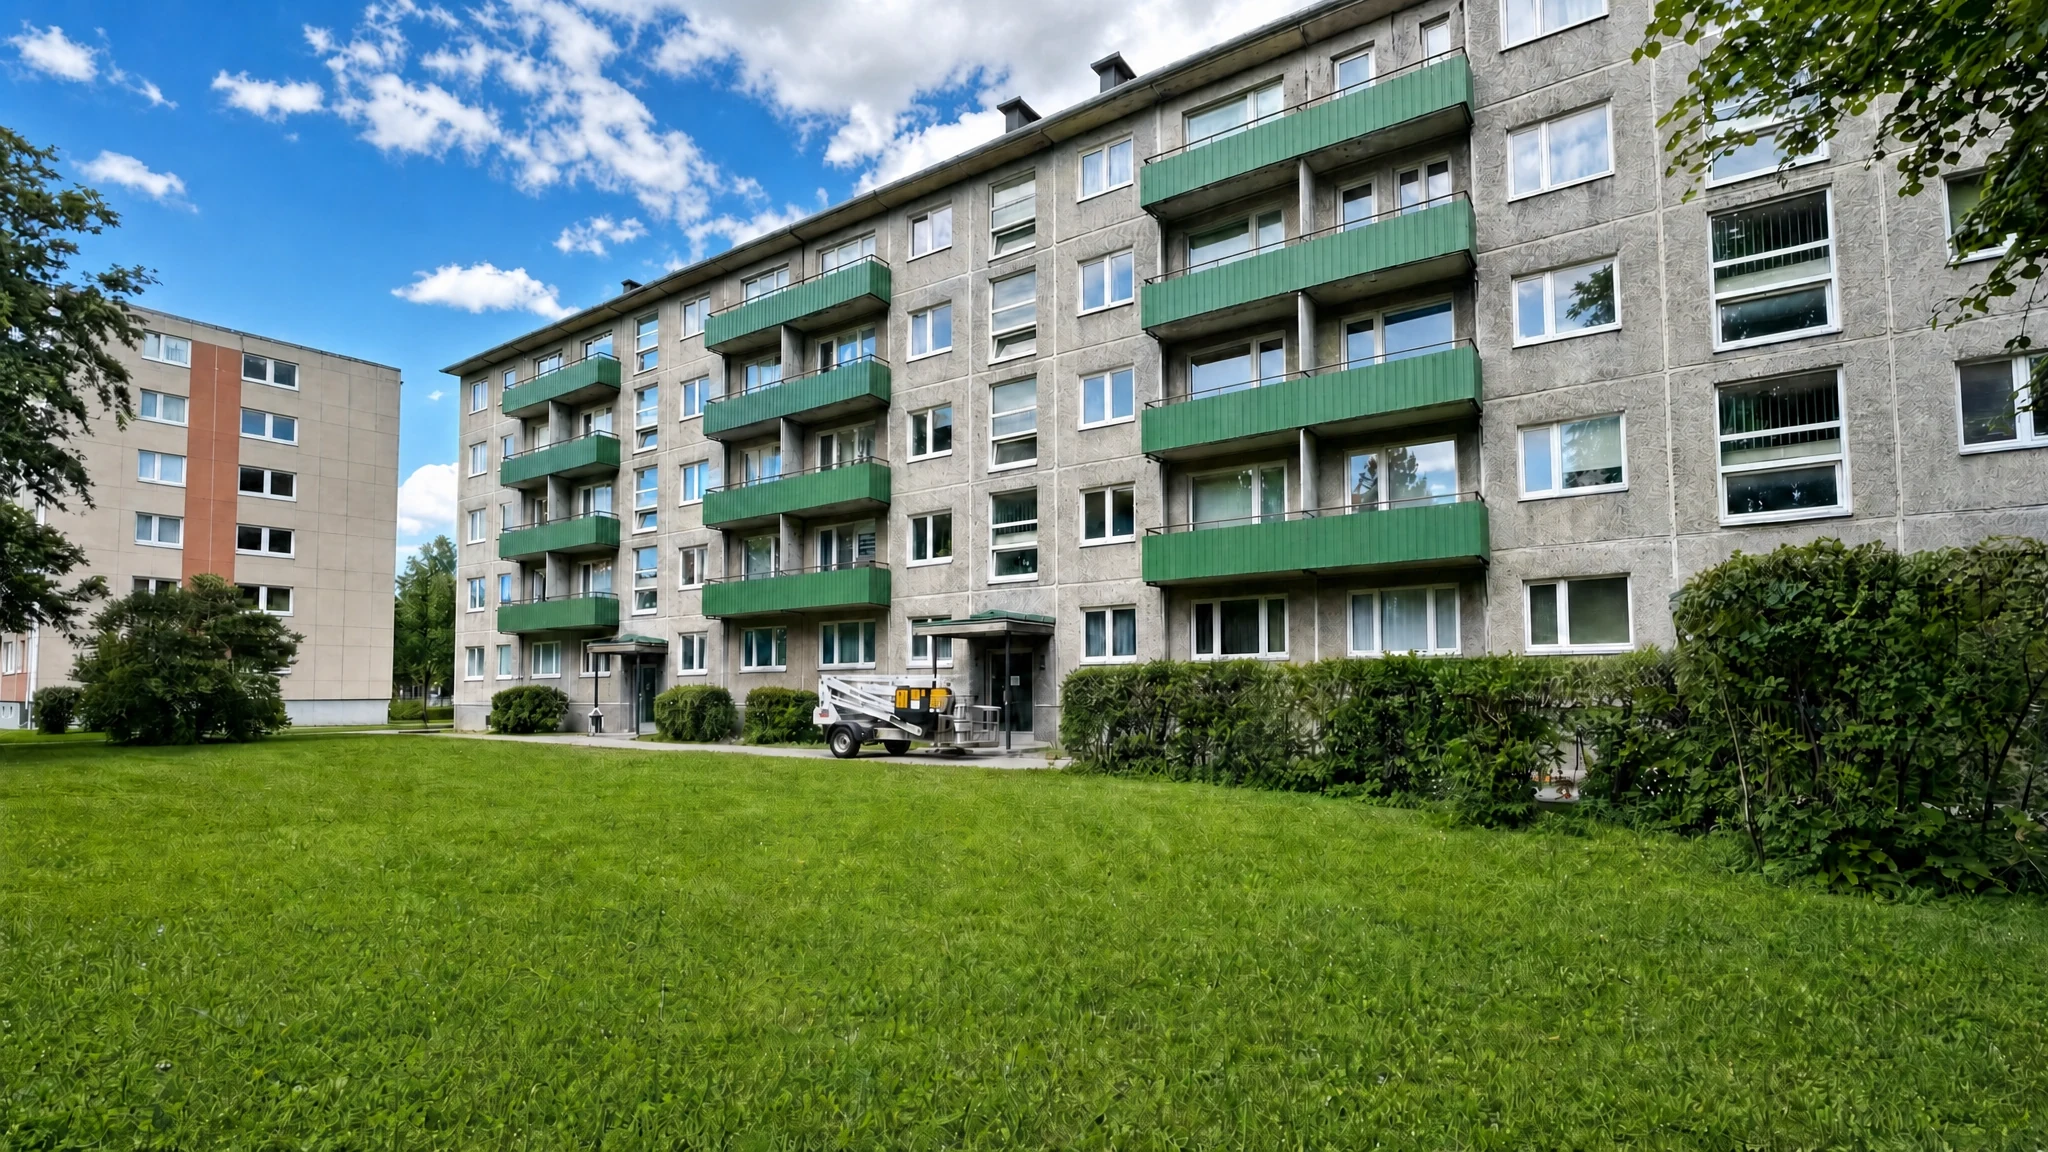
We repair apartment-building balconies: we restore the concrete, protect the steel from rust and shut water out of the structure.
COMPLETE RENOVATION. A CLEAR PLAN. CONSIDERED PROTECTION.
Each element has a specific role: the substrate carries the load, the bonding layer connects, the fall directs water and the elastic finish protects the surface.
The load-bearing structure is opened, cleaned and assessed before new layers are installed.
A two-component epoxy adhesive connects the existing concrete with the new repair and drainage-fall layer.
A cement-based layer reinstates the substrate and creates the required fall toward drainage.
A two-component epoxy primer prepares the cured mineral substrate for the elastic coating.
A continuous, seamless elastic layer forms the balcony floor's protective surface.
System-compatible decorative flakes are broadcast into the fresh coating to create the surface texture and final appearance.
Exact materials and thicknesses are selected according to substrate condition, moisture, service load and the approved project specification.
Worn coatings, cracks and open junctions allow moisture into the structure.
Water that gets past the threshold and slab soaks the interior finish, so the whole junction needs repair, not just the surface you can see.
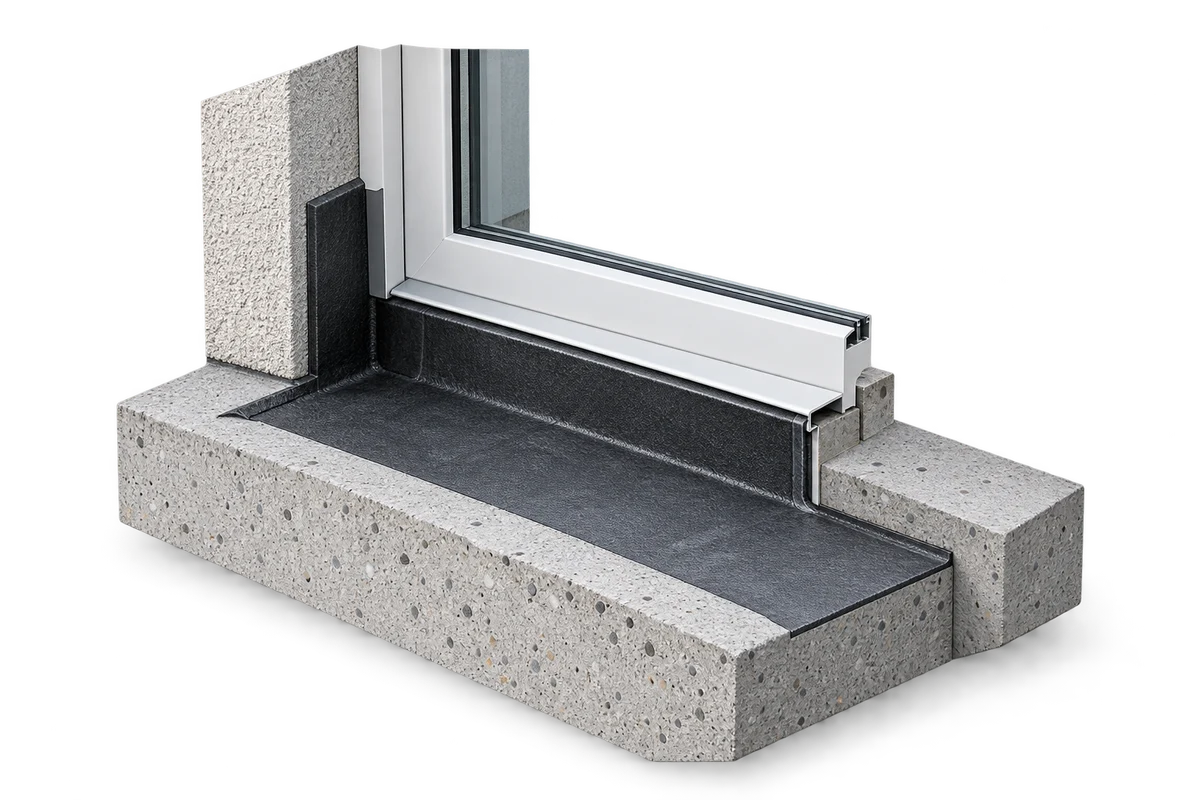
Once the outside water path is closed, we rebuild the lower wall, fit a new profile and seal the wall-to-floor joint.
We remove the old coating and weak substrate back to sound load-bearing concrete and clear away the debris.
We clear the remaining loose material and dust so the new layers go onto clean, sound concrete.
We clean the metal railing bases and treat them against corrosion, choosing the system to suit the condition of the metal and concrete.
An epoxy bond coat ties the old concrete to an exterior-grade EN 1504-3 class R4 repair mortar, which rebuilds the surface and sets the drainage fall.
Once the repair layer has cured, we prime it with epoxy and broadcast quartz sand into the wet primer, giving the next layer an even key.
Quartz sand, an elastic UV-stable polyurethane, decorative flakes and a clear protective topcoat act as one seamless coating.
Concrete, epoxy bond coat, R4 mortar, primer with quartz, elastic polyurethane and a decorative finish under a clear topcoat work as a single system.
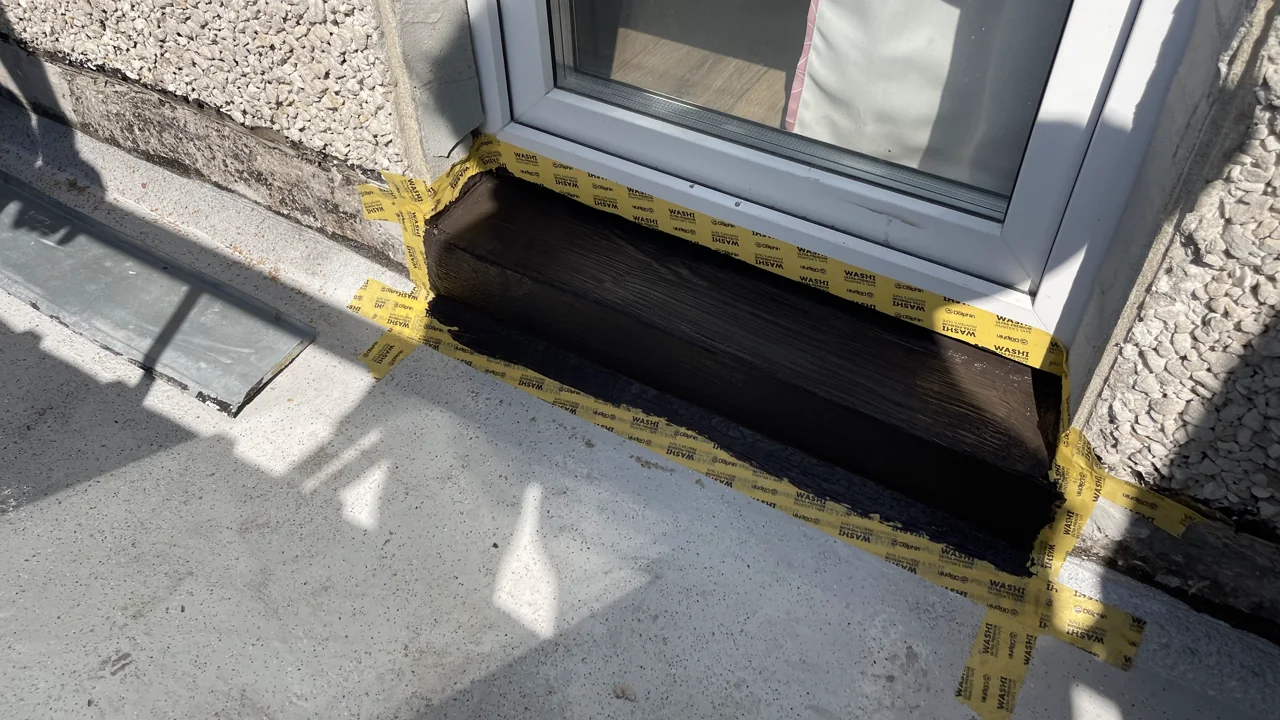
We clean the threshold and mask the edges so the waterproofing reaches right into the corners and finishes on a crisp line.
An unbroken elastic layer covers the threshold and joints, keeping edges and corners inside one continuous envelope.
We check that the coating is continuous, the corners are closed and the junction line is clean, so the whole detail at the door stays protected.
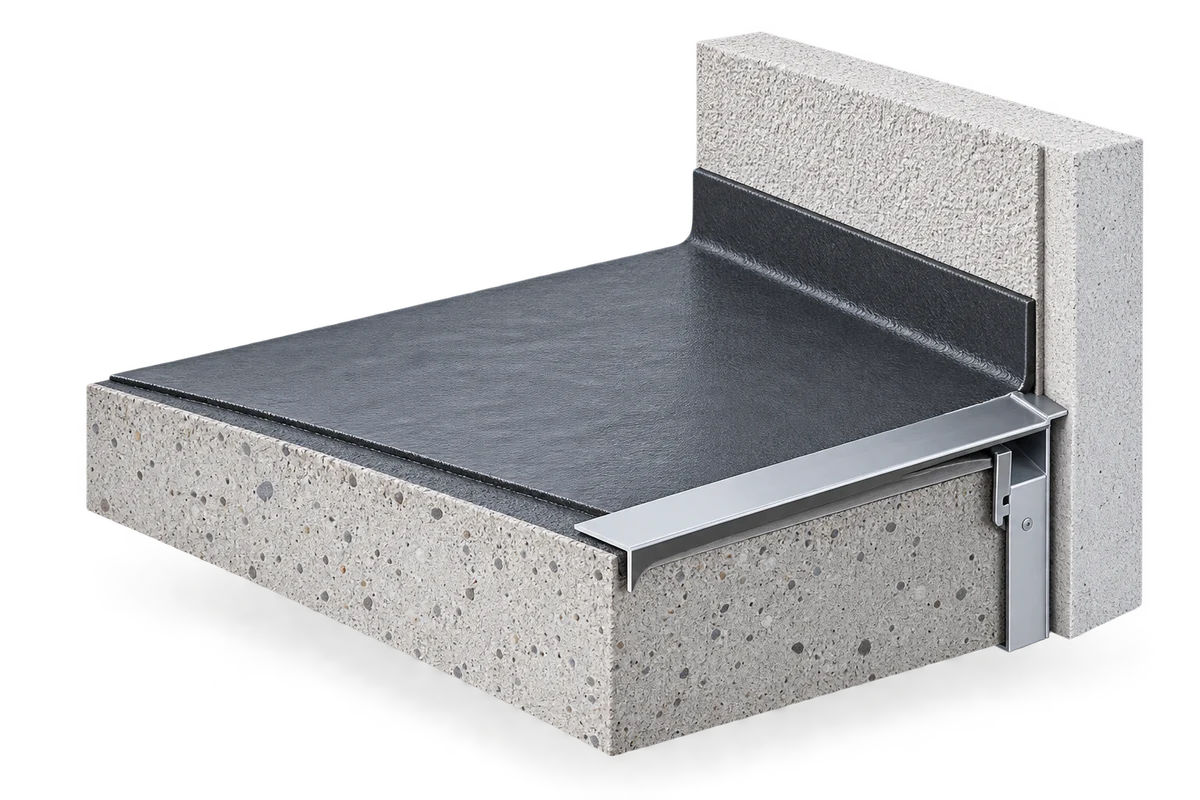
The new metal sill falls away from the wall; its drip edge and sealed ends send rainwater clear of the façade.
Cleaned reinforcement gets a cement-polymer passivating coat to EN 1504-7, which restores the protective alkaline environment and helps the repair mortar bond.
EN 1504-3 class R4 repair mortar fills the damaged concrete, restores cover over the steel and levels the underside for the protective finish.
The final inspection checks it all together: floor, threshold, sill, edges and the slab underside. The exact system for each building is confirmed on site.
Water gets into concrete through cracks and joints, and the damp patch often appears far from where it gets in. We trace the water’s path, repair the damaged concrete and close that path.
Unbroken waterproofing where floor, wall and threshold meet.
Water runs away from the wall to the balcony edge instead of pooling.
Selected sites
Real buildings in Tallinn, with photos and video of the work.

Over a year a façade goes from summer heat to winter frost, and concrete slabs expand and contract with it. A rigid joint can’t keep up and cracks; an elastic one stretches and returns to shape.
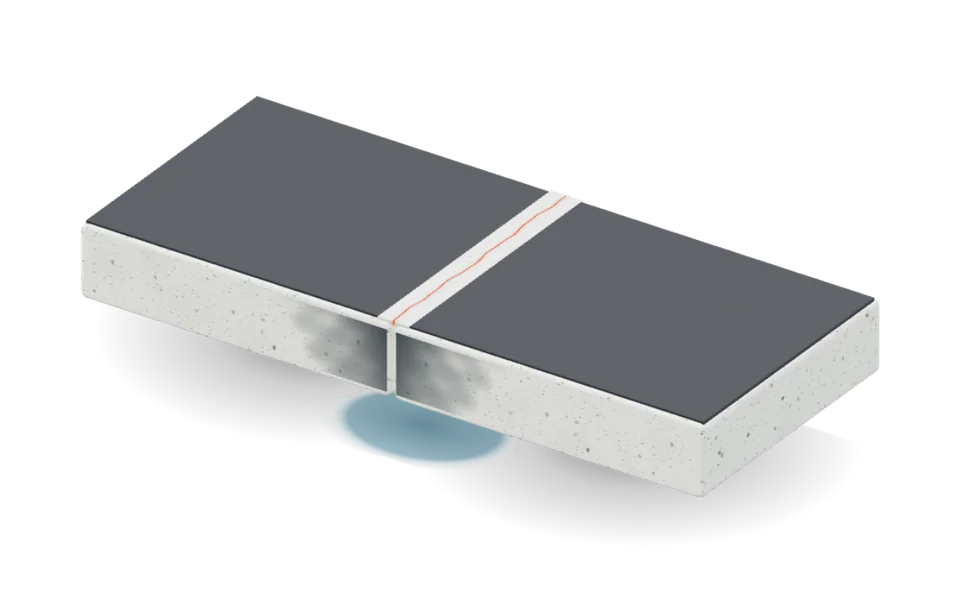
Rigid joint
Cracked: water gets in
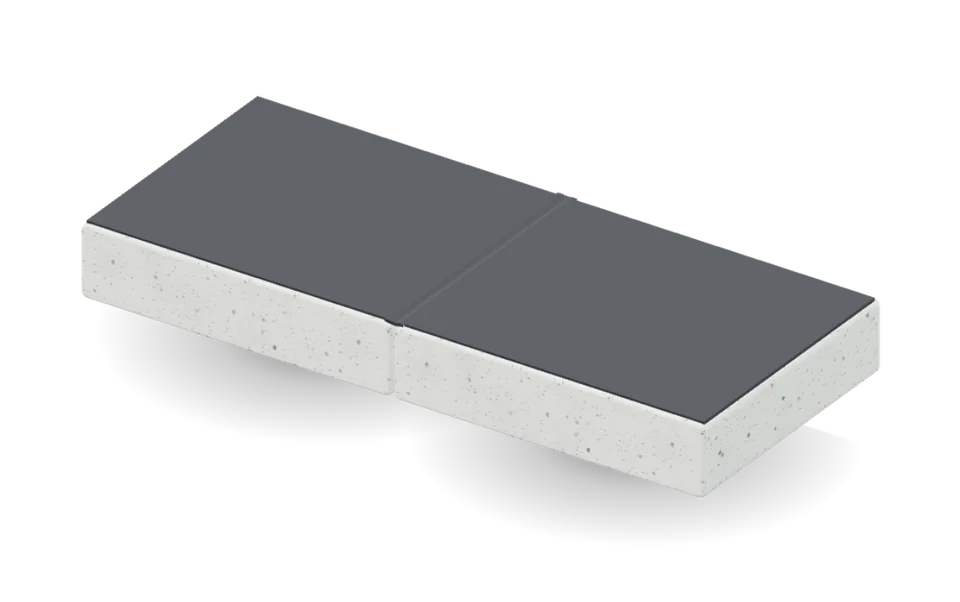
Elastic joint
Intact: water stays out
Illustration of the principle: movement is exaggerated for clarity.
What it looks like on a real building: from breaking out the old floor to the finished coating. For your building, we choose the repair based on the balconies’ condition.
Where water gets in
The work in photos: from damaged concrete to a protective finish.
We strip everything unsound back to solid concrete and clear the joint between balcony and wall.

Exposed reinforcement gets a protective coating, reducing the risk of further corrosion before the concrete is rebuilt.

A continuous, flexible, seamless layer covers the floor; the finish coat gives it its final texture.
Our working standard
Figures you can plan around before the inspection. Exact timing and cost come after it.
Six stages, from opening up to the finished coating. Each stage can show a frame from the video, though not every operation was filmed separately. We agree the scope and materials after the inspection.
First we remove everything damaged and unsound, back to solid concrete.
We mechanically remove weak cement layers until we reach sound load-bearing concrete.
We clear old filler, dirt and loose material from the joint between slab and façade.
We remove loose rust and dirt, then assess the condition of the metal.
Before rebuilding the concrete, we check the exposed steel and small details and remove anything unsound, including rotten timber add-ons.
We check how much sound steel remains. Whether it needs strengthening, replacement or welding is decided by a qualified specialist after examining the structure.
We clean, grind and vacuum the threshold, fixings and damaged metal or concrete details, and take out any rotten timber add-ons.
A cement-polymer passivating coat restores the steel's protective alkaline environment and reduces the risk of further corrosion from moisture. Railing fixings get their own solution, chosen for the metal type and condition.
We prepare cracks, gaps and the slab-to-façade joint and seal them with an elastic sealant that copes with normal structural movement.
We remove old filler, dirt and loose residue so the sealant bonds to clean, sound joint faces.
We fill the joint with an elastic exterior sealant made for façade and floor joints, which handles frost, moisture and normal temperature movement.
An epoxy bond coat ties the old concrete to a new cement-based layer that rebuilds the base and sends water to the edge.
We apply a two-component epoxy to clean, dust-free concrete to bond the existing slab to the fresh repair mortar.
We mix an exterior-grade cement mortar, built for moisture and temperature swings, exactly to its data sheet.
We lay and level the mortar to fall toward the edge or drain so water doesn't pool.
We prime the cured mortar and broadcast quartz sand into the wet primer to give the next layer something to grip.
Once the repair layer has cured, we apply a two-component epoxy primer.
Dry quartz sand broadcast into the fresh primer gives an even, rough key for the elastic coating.
Primer, quartz, elastic polyurethane and the decorative layer work as one coating.
One continuous, seamless coat at the thickness the system specifies.
We broadcast decorative flakes into the fresh polyurethane to give the floor its texture and final look.
What housing associations ask
What to know before the inspection and repair.
Yes. The specialist’s site visit and initial inspection are free of charge.
Typically seven working days. The schedule for the whole building depends on the number of balconies, the extent of damage, curing times and weather.
We agree access in advance and give the association a short guide: how to clear the balconies and how the safe work zone will be set up.
Yes. Temperature, rain and curing times set the order of the work. We plan each stage so every layer goes down in the right conditions.
A correctly installed system has a design service life of 10 years, protecting the structure from moisture throughout.
No. Where needed, we also repair the slab edge, reinforcement, façade joints and damaged parts of the concrete façade. We define the scope at the inspection.
Let us discuss the project
Send us the address and what worries you: cracks, leaks, rust. We’ll get back to you, clarify the scope and book a free inspection.
A specialist’s site visit and initial inspection are free of charge.


